# Photographic controls
# ISO
Controls the sensor sensitivity. Given the same exposure time:
| Sensitivity | Image brightness | Image noise (grain) | Other remarks |
|---|---|---|---|
| Large | Brighter | More noise | Large sensitivities allows you to use shorter exposure times. |
| Small | Darker | Less noise | Smaller sensitivities will reduce noise, but might require longer exposure times. |
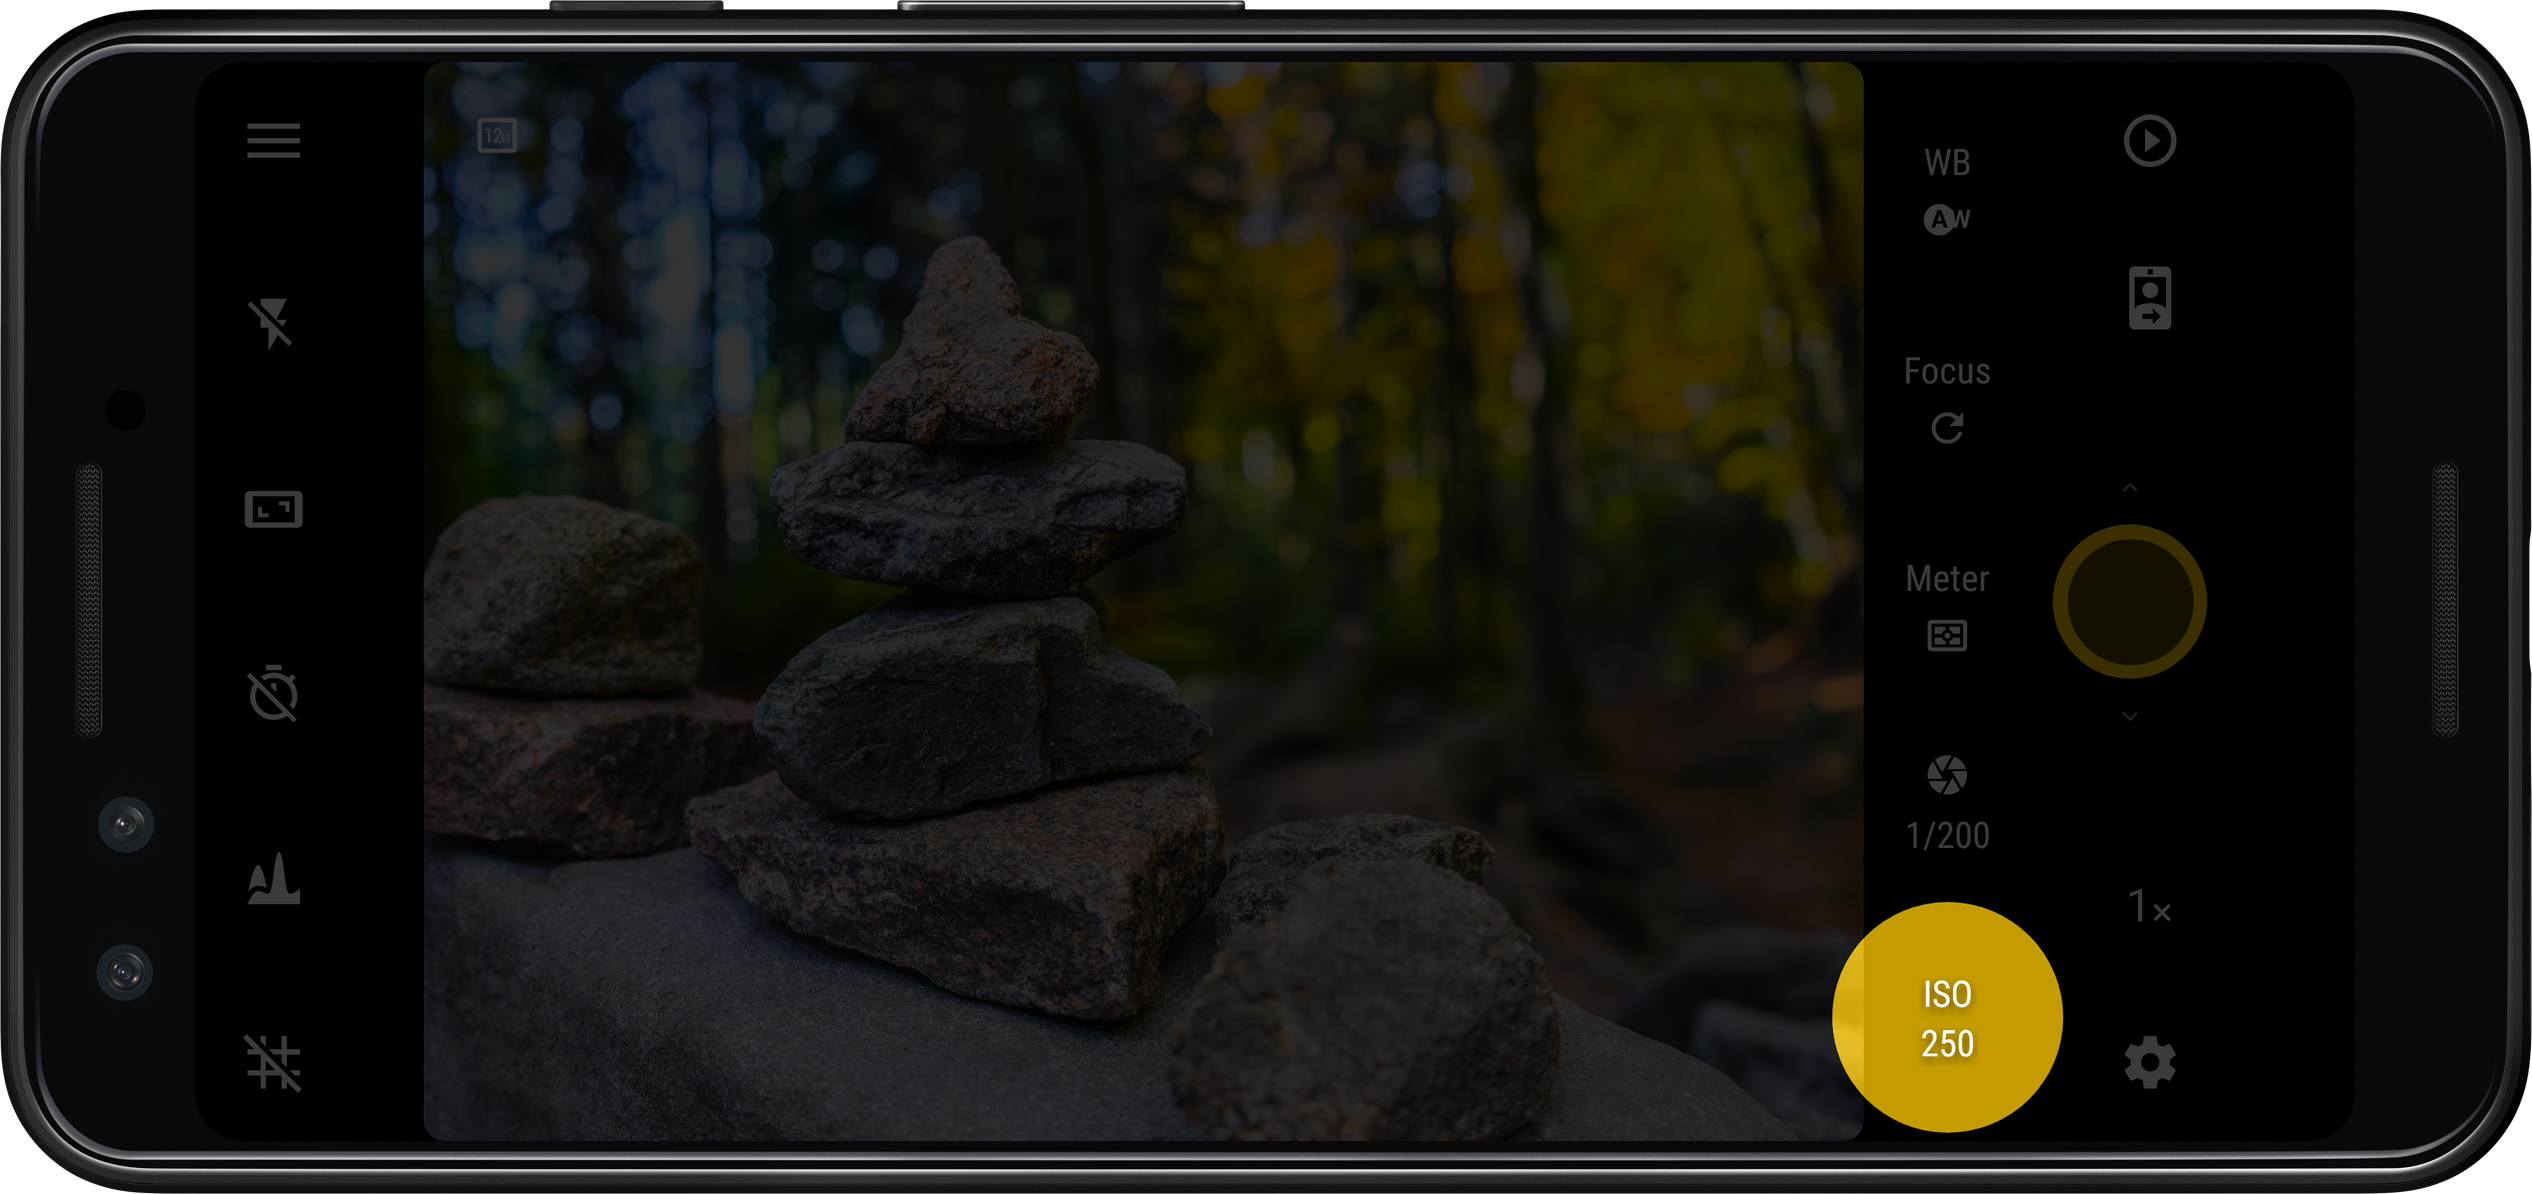
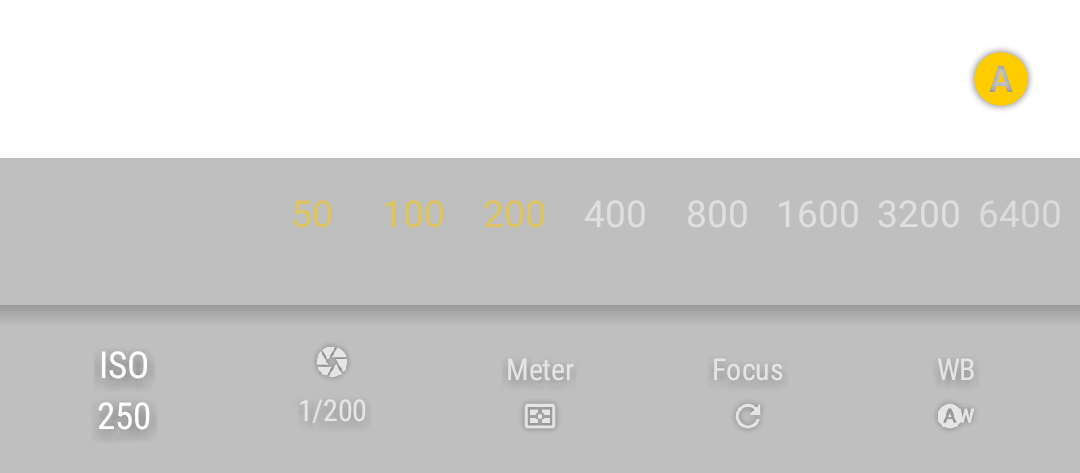
Select the ISO value: automatic (AUTO) or in the range from ISO 50 to ISO 3200, depending on the device (some sensitivities may not be available, or may take no effect if Camera FV-5 is unable to detect the available ISO range of your device).
# Exposure time
Controls the amount of time the sensor is exposed to the light during the photo capture. Given the same sensor sensitivity:
| Exposure time | Image brightness | Motion blur | Other remarks |
|---|---|---|---|
| Short (shorter than 1/50 of a second) | Darker | Reduced motion blur on most situations | Freezes motion on most situations, almost no risk of hand shake motion blur. |
| Medium (1/50 - 1/10) | - | Might exhibit motion blur, requires steady hands | The longest exposure time that can still be used hand-held. |
| Long (longer than 1/10) | Brighter | Increased motion blur | Almost always requires a tripod, otherwise will result in shake blur. |
Note
The exposure times given in the table and the expected image brightness, motion blur and the ability to shoot hand-held should serve as orientation only. Optical image stabilization (OIS) that might or not be present on the camera you are using will change the shutter speed after which handshake blur will appear.
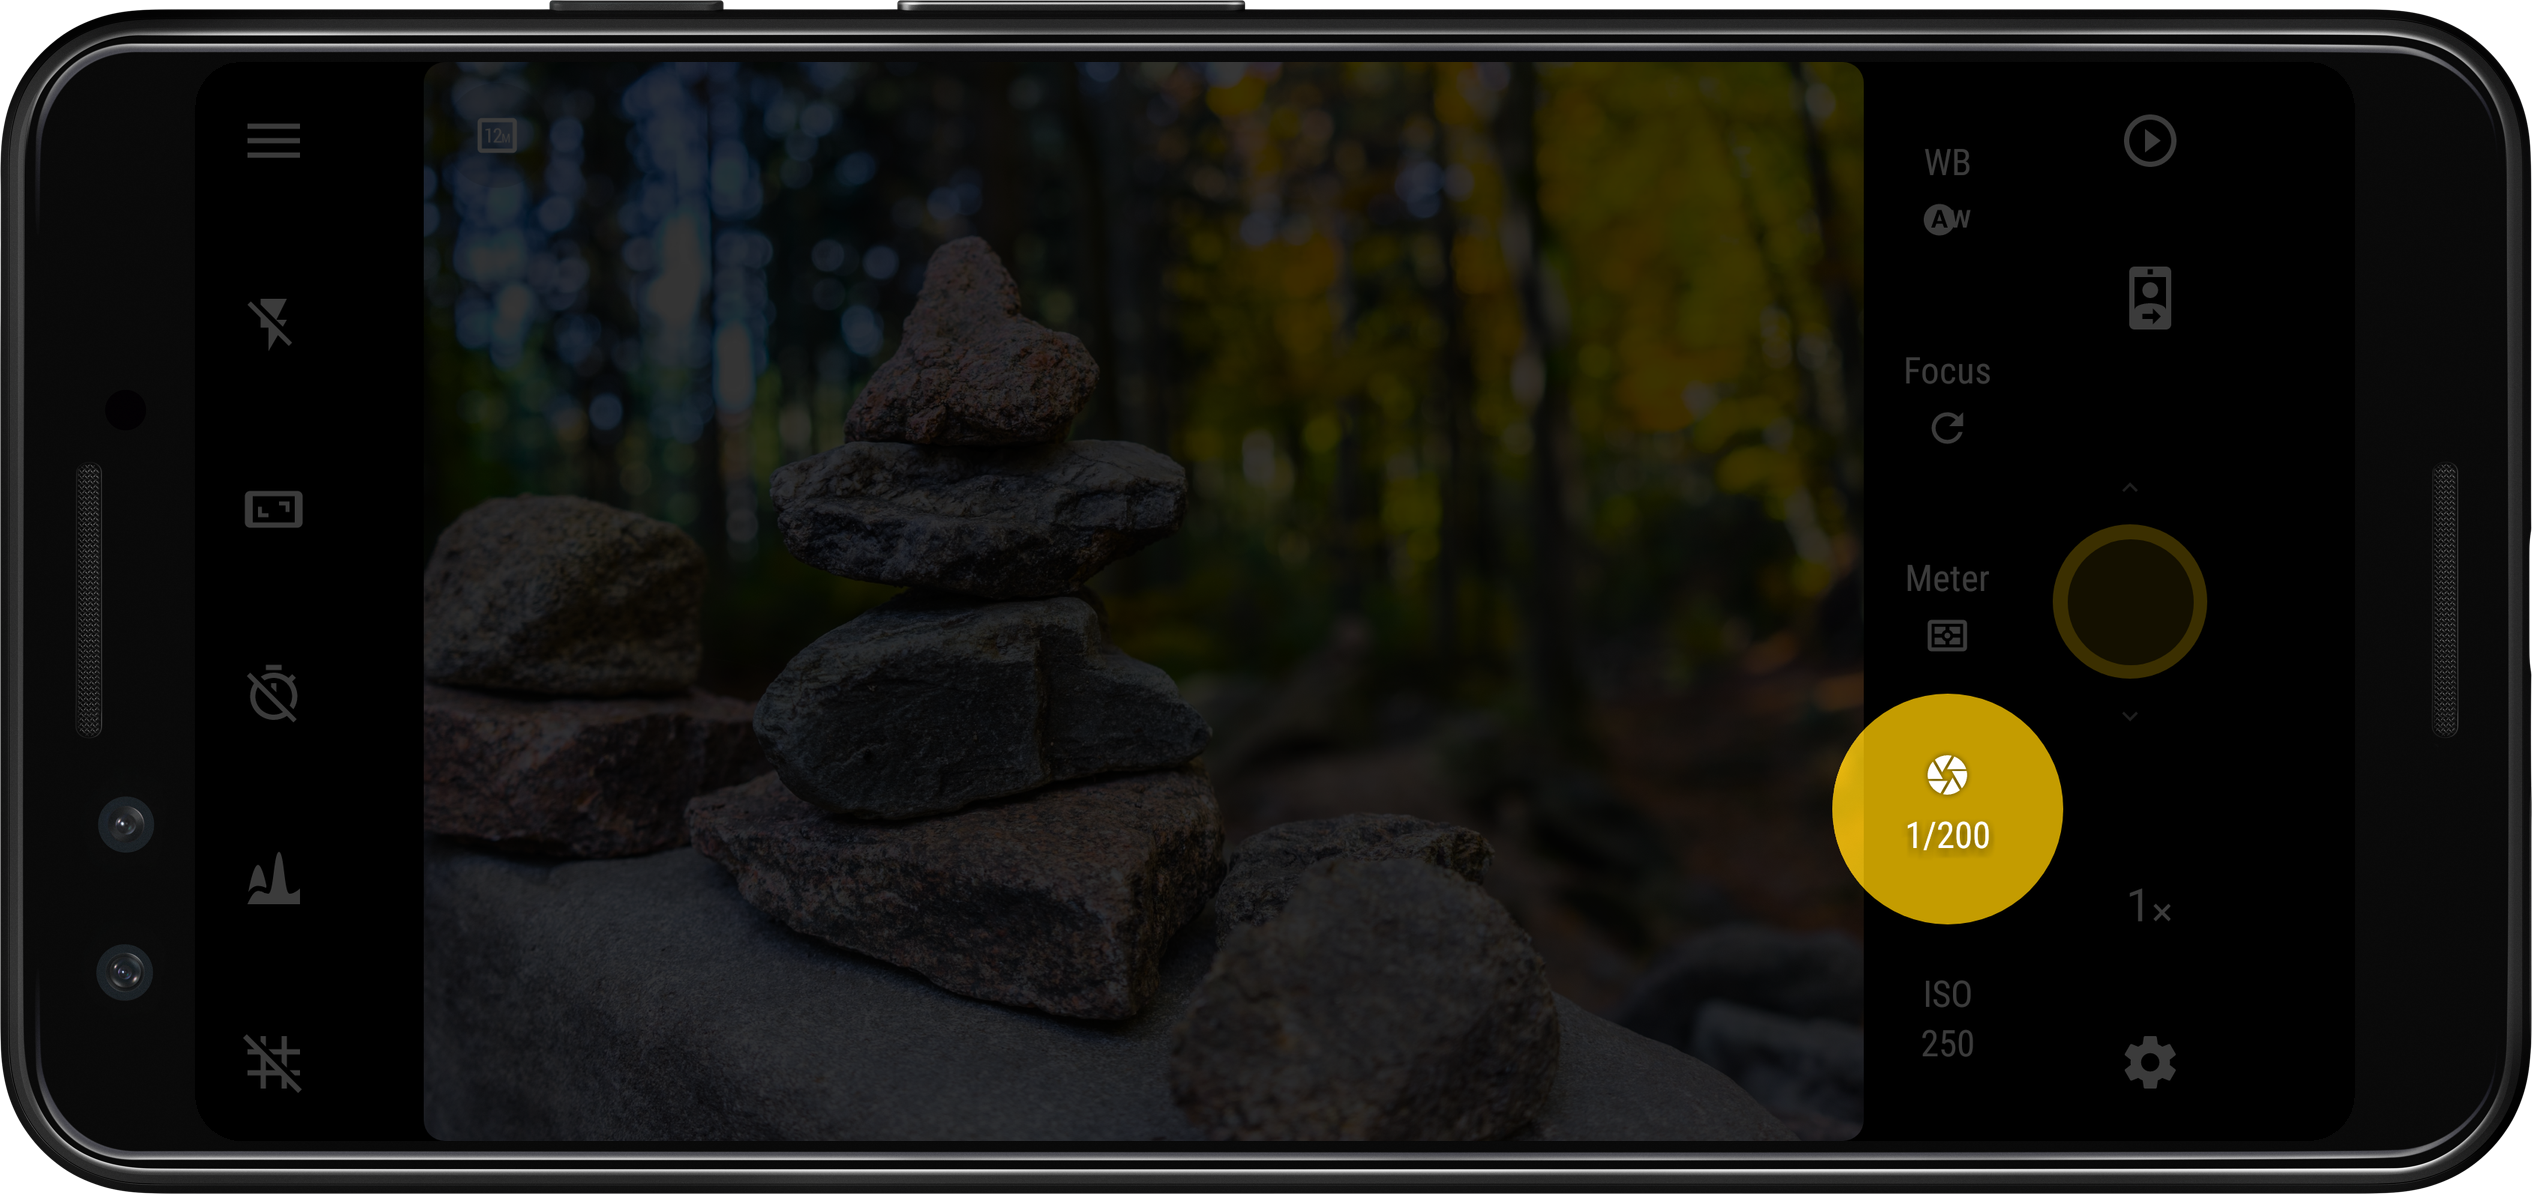

The dialog (pictured above) simply provides an exposure time scale where you can select manually the exposure time. The range of exposure times you can select is device-dependent, the same for the number of steps between the maximum and minimum exposure times. The exposure times are shown as fractions of seconds up to 0.4”, and then as decimal numbers onwards. The exposure time scale is logarithmic.
When the exposure is set to automatic, the scale is shown semi-transparent, and in most cases (if the camera can inform the app of the current exposure time) the scale moves to reflect the current exposure time. When you move the scale manually, the manual exposure time mode engages, and the scale is displayed opaque. To go back to automatic exposure, tap on the  button.
Legacy devices and devices without native manual exposure support
On mobile phones running Android 4.4 KitKat or older, as well as on those where native manual exposure support, there is no specific exposure time control (like in fractions of seconds) like traditional cameras, given a limitation of the operating system and closed camera drivers. Therefore, the only available options for setting the exposure time are some presets.
- Short. Forces a short exposure time suitable for handheld shooting. On most devices this gives 1/30s or shorter.
- Long. Forces a long exposure. On most devices, this gives ½ of a second to 1” exposure time.
- Long+. Forces a longer exposure. On most devices, this gives 1” to 2” exposure time.
There are also some presets for long exposure (1”, 2” and 5”) but you can also manually select the exposure time from 0.3 to 60” with an accuracy of 0.1 seconds. Those open shutter modes are actually digitally composed long exposure photos that don’t provide the same quality as true long exposure provided by real cameras. Also, the photo resolution on this mode drops to 1 MP to 2 MP depending on the device, because the live view is used to produce the long exposure photograph.
# Metering mode
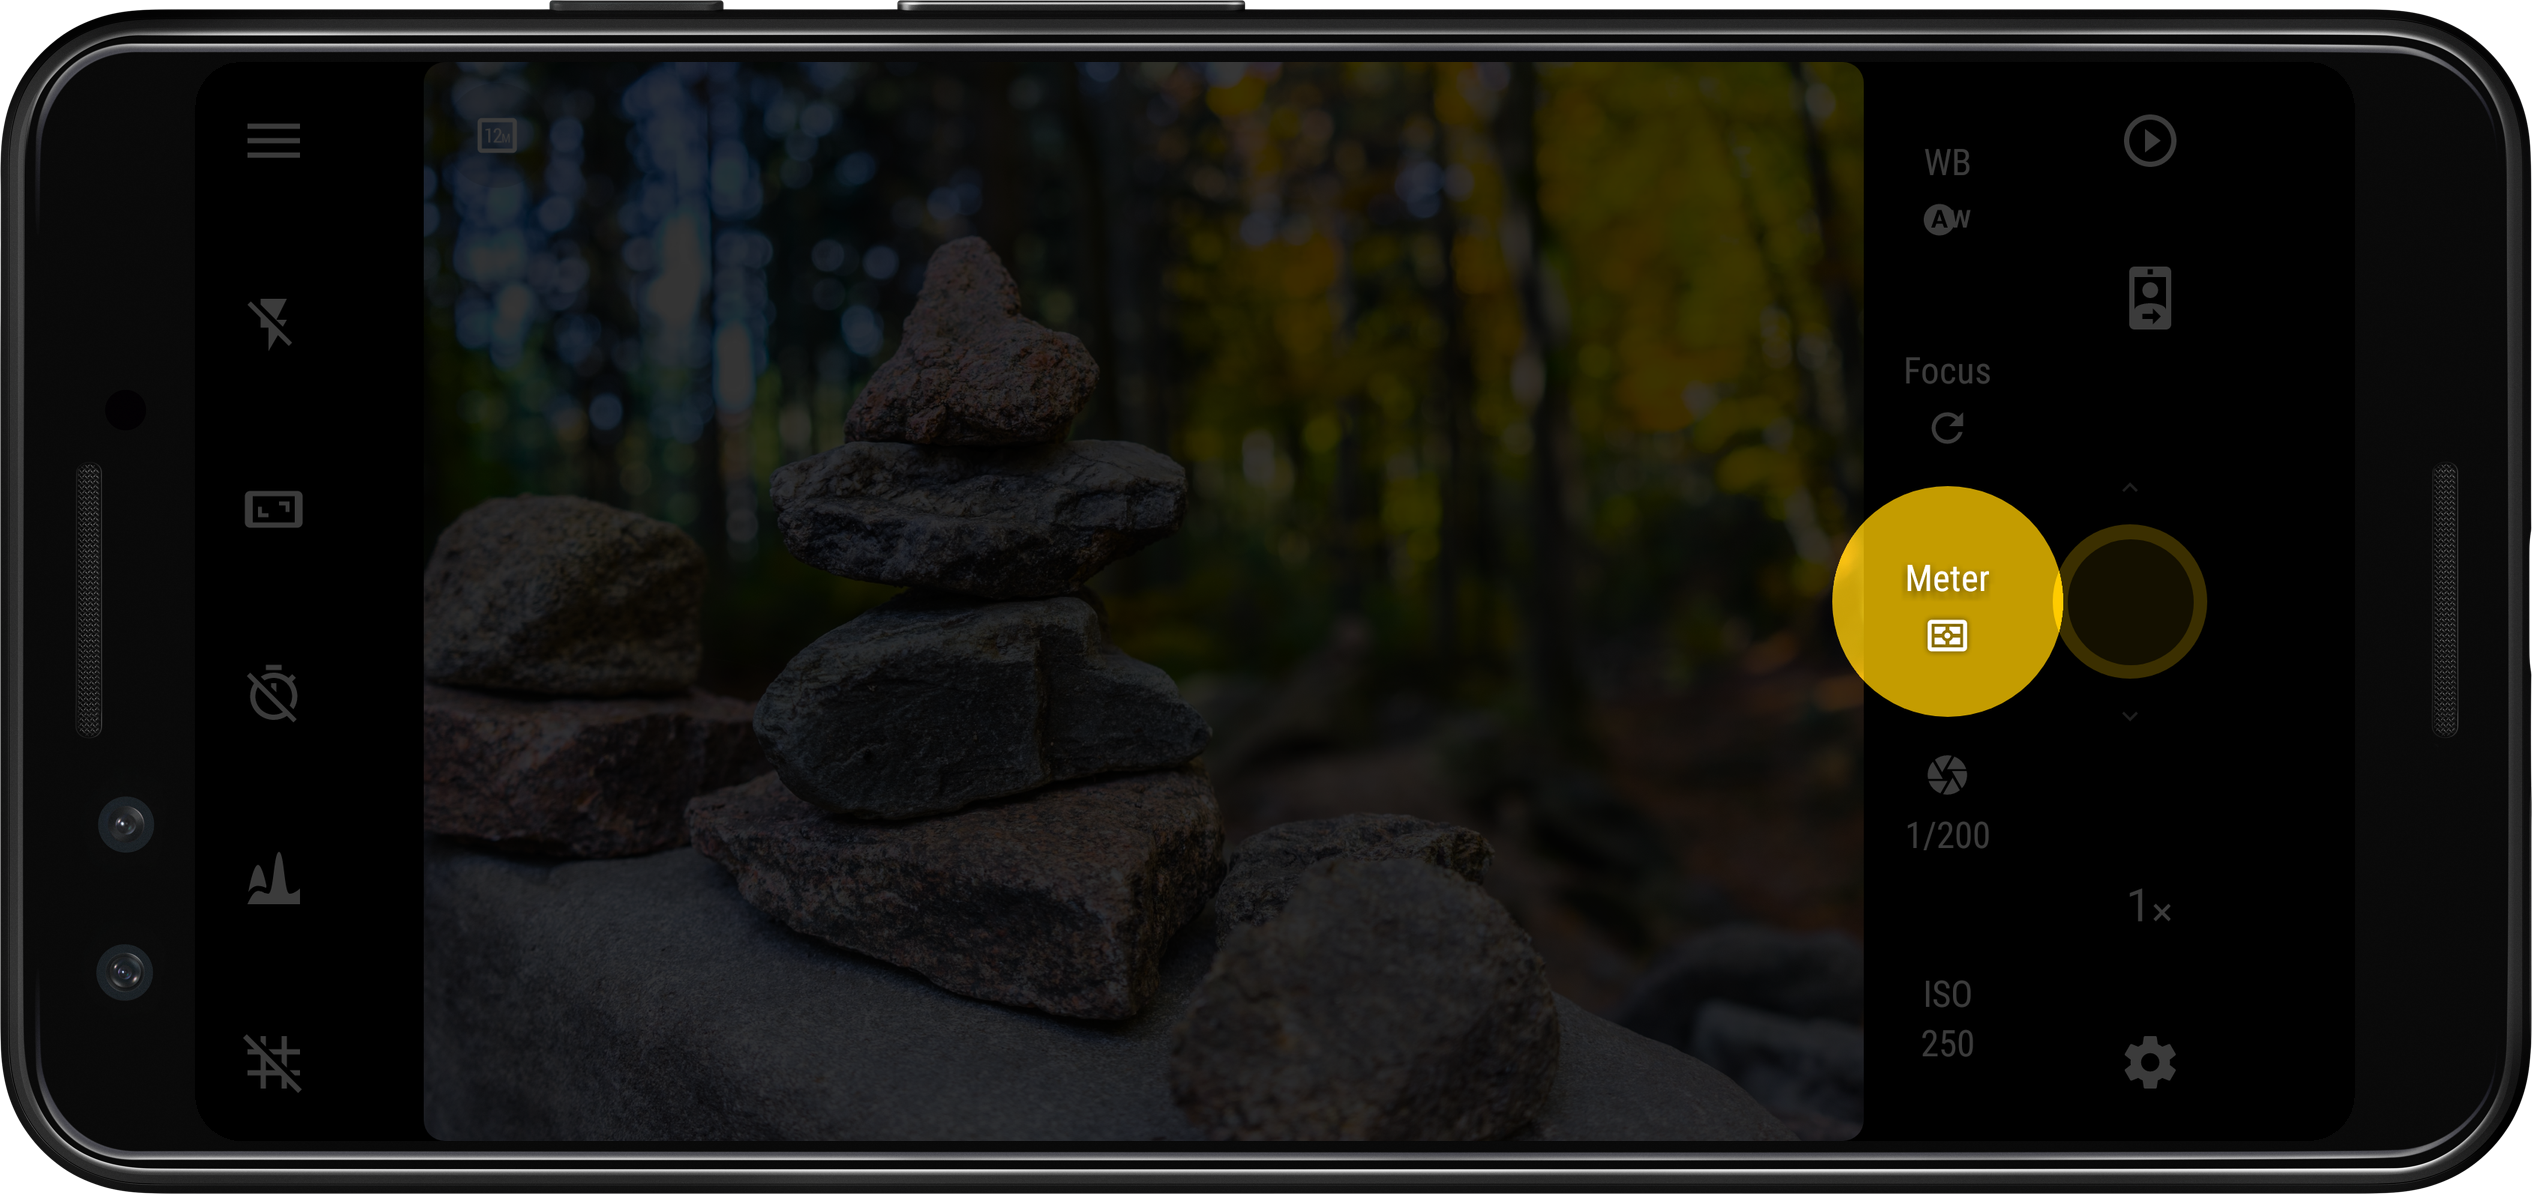
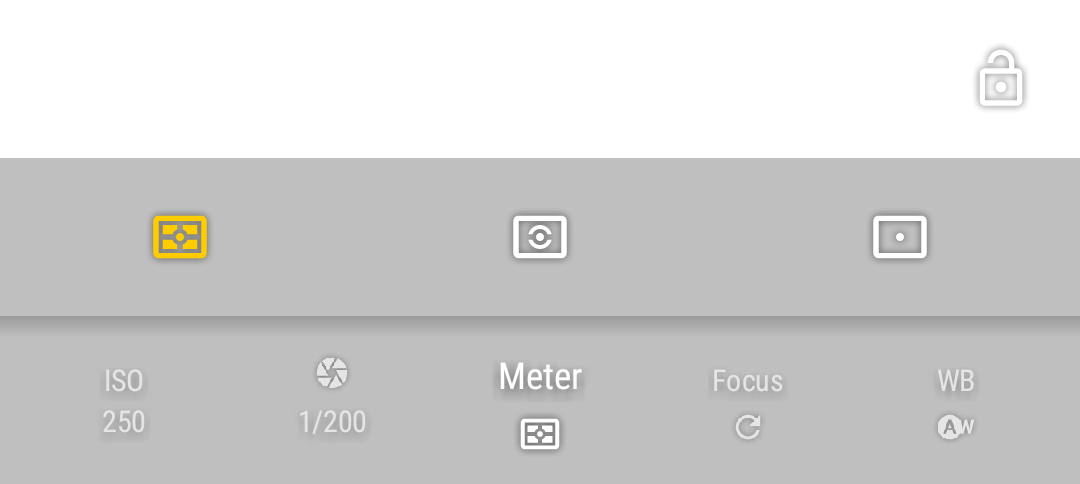
Select which zones to use from the picture to meter light. The available options are:
| Symbol | Description |
|---|---|
 | Matrix. Use all zones to meter light. |
 | Center. Use the central part of the picture to meter light. |
 | Point. Use the area of the focus rectangle when it is centered on the viewfinder. In case you are using touch-focus (i.e. the focus rectangle is not centered) the metering point will still be centered. If you want point metering, but not centered, you can use touch metering (if available). |
 | Auto-exposure lock. Stops the automatic exposure algorithm, keeping the last automatic exposure time calculated while the lock is active. Tap the toggle again to unlock. Supported only on Android 4+ devices with the appropriate support from the camera hardware. |
# Focus mode

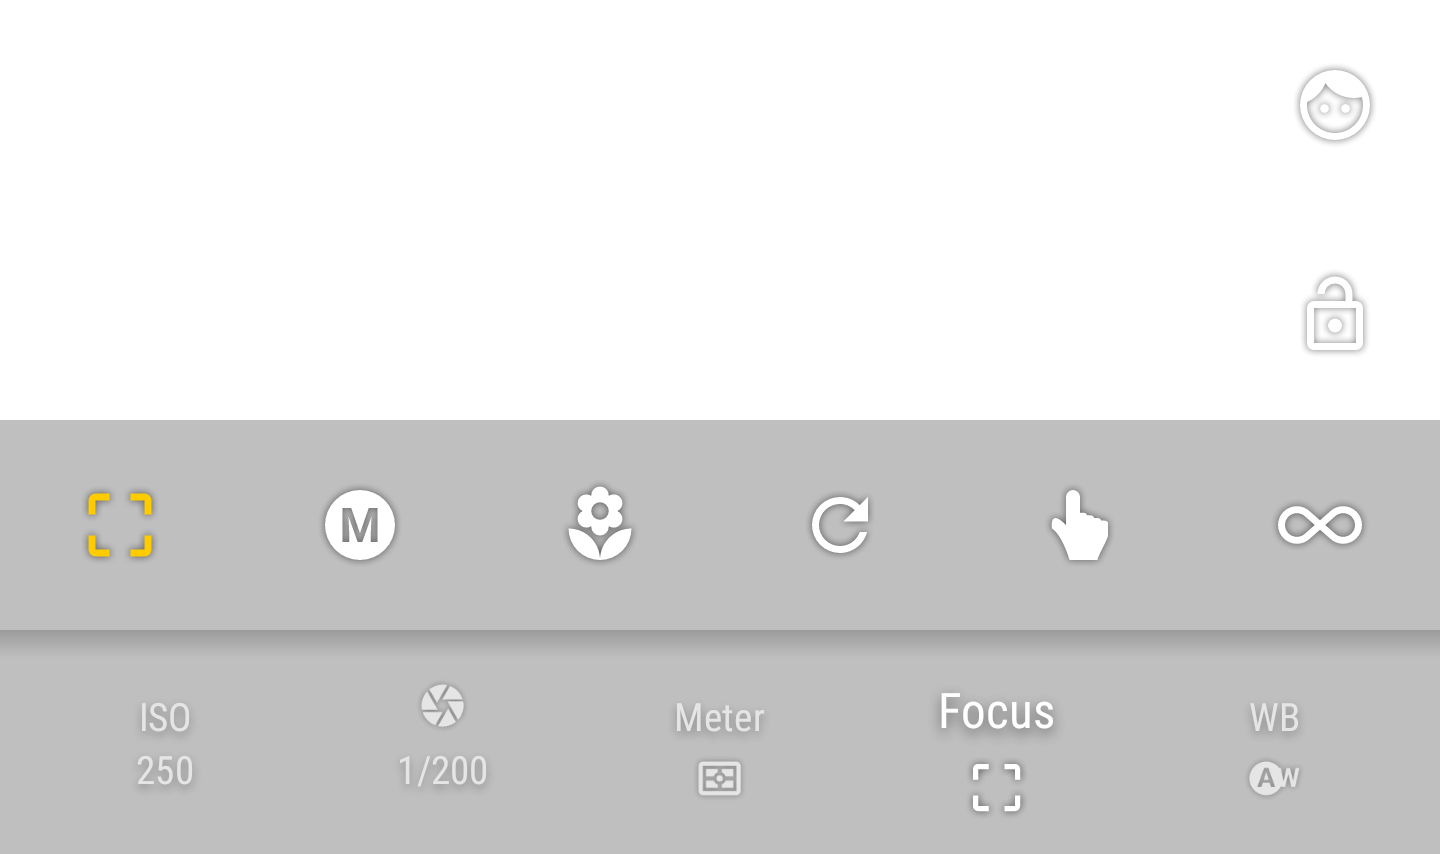
You can choose from one of the following focus modes, plus a focus lock switch.
| Symbol | Description |
|---|---|
 | Autofocus. Focus anywhere on the picture. Focus priority depends on camera maker. Tap anywhere on the viewfinder to trigger AF. |
 | Manual focus. Available only on Android 5+ and on supported hardware. The focus reticle is hidden, and you can slide on the focus scale to adjust the focus manually between the closest position possible and infinity. |
 | Macro. Gives AF system a hint to prioritize closer objects. On some devices, effectively lowers the allowed minimum focusing distance. |
 | Face detection focus. The focus reticle is hidden, and the focus is automatically adjusted to be positioned on faces, that are automatically detected in real time in the viewfinder. |
 | Touch focus. Gives AF system a hint to focus on the selected object. Tap anywhere on the viewfinder to select the focus point and trigger AF. |
 | Continuous autofocus. The focus is automatically and continuously adjusted according to the camera autofocus mode criteria. |
 | Infinity. Set the focus to infinity. Tapping on the screen always result in focus confirmation and AF is not triggered. |
| Autofocus lock. Locks the focus at the current position. Tap the toggle again to unlock. |
# White balance
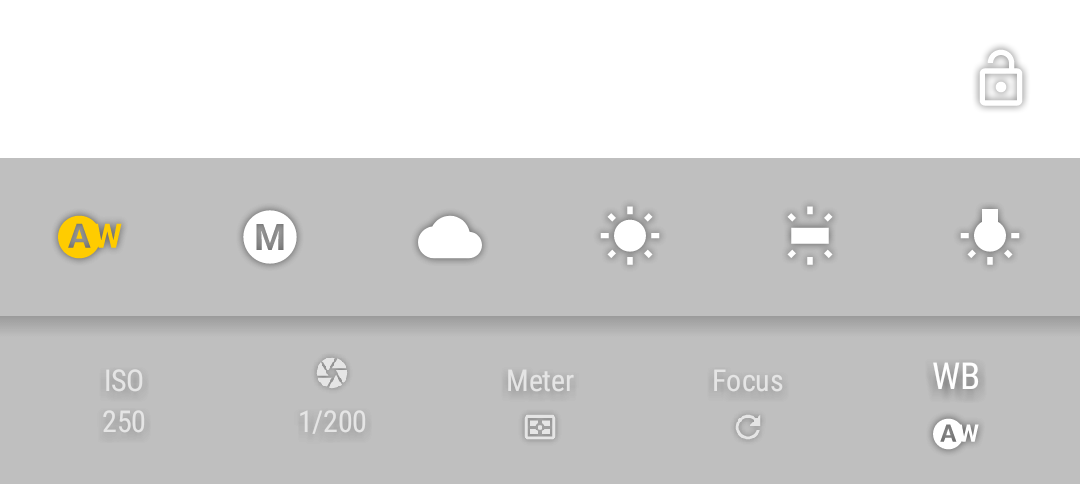
You can compensate white biasing because of different illuminant temperatures. As of now, you can choose from different presets (ordered from warmer to colder temperatures):
| Symbol | Description |
|---|---|
 | Automatic. The camera calculates the temperature of the light source present on the scene and automatically compensates it. |
| Manual white balance. Available only on Android 5+ and on supported hardware. It lets you select the white balance temperature manually. The span of the scale depends on the device and the currently selected lens. |
 | Cloudy. |
 | Sunny. |
 | Fluorescent light. |
| Warm fluorescent light. |
 | Incandescent light. |
| Auto white balance lock. If the white balance is set to auto, when the toggle is active, the automatic white balance algorithm will stop running, keeping the last calculated scene temperature. Tap again the toggle to unlock it and recalculate the scene color temperature. |
Note
Preset white balance settings depend on device manufacturer support.